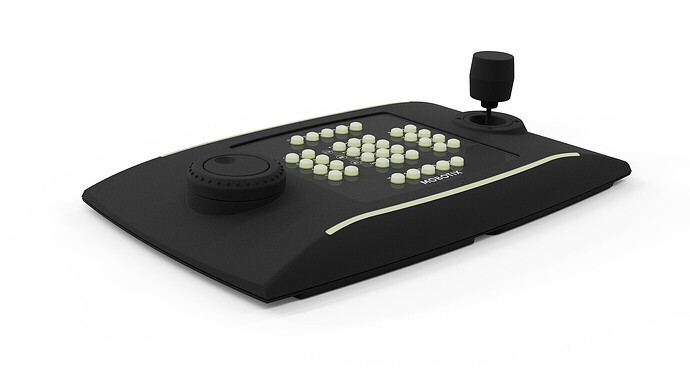
The MOBOTIX PTZ Keyboard is used for optimized control of the video management systems (VMS) MOBOTIX HUB.
This is an instruction on how to install your PTZ Keyboard into MOBOTIX HUB Desk Client.
Step by Step Introduction
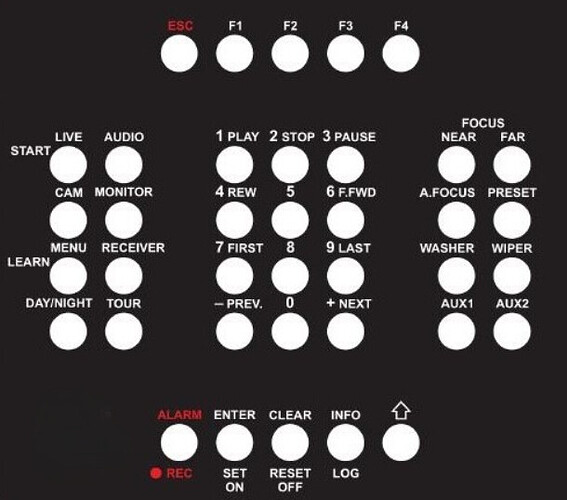
- For the MxHUB you need to configure the function of the buttons.
a) Go to more Menu and click on Settings
b)At Settings go to the option Joystick
c) Configure your Keyboard through the drop down lists for the buttons as the below table, or as you find it more practical for you
- If you need to add PTZ Presets, please follow the guide below:
a)First you have to activate the PTZ option on your PTZ camera in the Mobotix HUB Management Client
b)After you activated the option, go to the Mobotix HUB Client, and add the camera in your view, down in the right corner of the live picture you should be able to see the PTZ logo like in the screenshot
c)Click on Manage PTZ Presets and add your presets
d)After this is done, you can go back to the Settings → Joystick → Select the preset in which button of the PTZ Keyboard you want to have it.
Below is the table which of the options you can use with the PTZ Keyboard in the MxMC or MxHUB
| Number/ | MOBOTIX MxMC Function | Joystick button | MOBOTIX HUB Function | Section Joystick - visual |
|---|---|---|---|---|
| Button | ||||
| 1 | Previous Camera | 1 | No action | |
| 2 | Next Camera | 2 | No action | |
| 3 | Cam Seuencer | 3 | No action | |
| 4 | Previous Group | 4 | Select the previous view | |
| 5 | Next Group | 5 | Select the next view | |
| 6 | Group Squencer | 6 | No action | |
| 7 | Device Tree | 7 | Toggle Side Pane | |
| 8 | Alarmbar | 8 | No action | |
| 9 | SmartDataBar | 9 | No action | |
| 10 | Cancel (Ziffernfolge abbrechen) | cancel | No action | |
| 11 | 0 (0Button) | 0 | ||
| 12 | Enter (Ziffernfolge bestätigen) | enter | No action | |
| 13 | Door Opener | 13 | No action | ! |
| 14 | Light toogle | 14 | No action | |
| 15 | Softbutton 1 | 15 | No action | |
| 16 | Softbutton 2 | 16 | No action | |
| 17 | Softbutton 3 | 17 | No action | |
| 18 | Softbutton 4 | 18 | No action | |
| 19 | Softbutton 5 | 19 | No action | |
| 20 | Softbutton SELECT * (Button Combination) | 20 | No action | |
| 25 | FullWindow | 25 | Toggle full screen view(s) | |
| 26 | PTZ SELECT * (Button Combination) | 26 | Put a PTZ Preset Directly (Possible solution add as soft buttons) | |
| 27 | Live Recording START/STOP | 27 | Toggle recording on selected camera | |
| 28 | Snapshot | 28 | Create snapshot | |
| 29 | Microphone | 29 | Talk to speak | |
| 30 | Speaker Pickup/HangUp | 30 | No action | |
| 31 | Select Monitor (Monitor Icon) (Button Combination) | 31 | Select window | |
| 32 | Select Camera (Camera Icon) (Button Combination) | 32 | No action | |
| 35 | Live View | 35 | show live | |
| 36 | Playback View | 36 | show Playback | |
| 37 | Grid View | 37 | Search for camera and view text or Select view “the view you have created” | |
| 38 | Graphic View | 38 | No action | |
| 39 | Info View | 39 | No action | |
| 33 | Previous image (jogwheel) | Previous Image | ||
| 21 | Previous image | 21 | Previous Image | |
| 22 | Backward play | 22 | Start reverse playback | |
| 23 | Stop/pause | 23 | Stop playback | |
| 24 | Forward play | 24 | Start forward playback | |
| 40 | Next image | 40 | Next Image | |
| 34 | Next image (jogwheel) | Next Image | ||
| Last sequence | You can get to the last recorded sequence | |
|---|---|---|
| Restore Application | Maximize minimized application | |
| Reload server configuration | Refreshing the server in order to get new information | |
| Minimize Application | Minimize the application | |
| Maximize the selected view | If you select a camera on the grid you can maximize the view |
To use the manual for the joystick, it is necessary to have the following information about the layout:
the manual is to find here:


