The following document introduces the IP Notifies.
What are IP Notify messages
IP Notify messages are TCP network messages used by MOBOTIX cameras for:
• Sending information to remote devices in order to notify Events/Alarm or simply to send information about the camera’s internal sensors (temperature, illumination etc…). IP Notify messages can also include attachments such as System Information, Images, Video Clips and Report Logs.
• Executing commands on remote devices (via CGI - Common Gateway Interface). For example it’s possible to instruct a remote MOBOTIX camera to play a sound clip execute an E-mail / FTP / SignalOutput profile. It is also possible to control MOBOTIX surveillance software such as MxCC or MxMultiViwer as well as 3rd party devices such as I/O boards, network controlled lights, irrigation, blinders and so on. Finally it’s possible to trigger scripts running on remote computers in order to execute multiple commands.
• Configuring remote web-server based devices (via API - Application Programmer Interface) such as other MOBOTIX cameras or 3rd party devices like
To better understand what an IP Notify message is let’s consider the IP packet as an envelop on which you can type the recipient address (destination IP address) for the delivery. Within the envelop there is usually a letter and this one represents your message. Such a message can contain simple text as well as HTTP commands and, if needed, you can attach some extra information such as System Messages, Images, Video Clips and Report Logs.

How to send IP Notify messages
IP Notify messages can be sent in four different ways:
• Upon event: the camera can execute an IP Notify profile when a specific event (or a combination of events) occurs. This configuration can be made from Setup Menu > Event Overview to select which events can generate actions and then Setup Menu > Action Group Overview to define which actions should be performed in case of event.
• On a regular basis: MOBOTIX cameras allows executing actions on a regular basis from the page Admin Menu > Time Tasks. Through Time Tasks it’s possible, for instance, to trigger an IP Notify profile every Monday at 8:00 am and 6:00 pm. Please note that the highest frequency allowed by Time Tasks is 1 action per minute. For higher frequency it’s possible to use Periodic Events and Action Groups form the Setup Menu as described in the previous point.
• By using the URL of the IP Notify profile: each profile configured within the camera can be triggered via a specific CGI. If you want to trigger the IP Notify profile “MxCC-Alarm” you can use the following command: http://<cam_ip_address>/control/rcontrol?action=notifycurrent&name=MxCC-Alarm
• Via softbuttons: another interesting feature of MOBOTIX cameras is the possibility to define softbuttons directly on the camera’s web interface. Softbuttons are shortcuts for executing actions or modifying the camera configuration but if we look at them closely they are nothing else than predefined URL links. It’s important to note that the target of the softbuttons configured from the camera’s web interface is the camera itself; no other targets can be specified.
IP Notify profiles
MOBOTIX cameras allow the user to define three different types of IP Notify profiles from the page Admin Menu > IP Notify Profiles:
• Raw TCP/IP: Sends the raw data in TCP packets. Use this protocol if you would like to transmit text only, e.g. for sending information of the camera’s sensors (temperature, light, etc…) or for triggering other cameras’ IP Receive events.
• HTTP/1.0 Request (w/ or w/o acknowledge): Sends an HTTP request to the receiving computer (a MOBOTIX camera or a web-server based 3rd party device). If the acknowledge is required, the camera will only consider the IP Notify message as successfully sent, if the receiving device returns a confirmation message. As mentioned before HTTP requests can be usually sent to execute commands (CGI) or change the configuration of remote devices (API). NOTE: MOBOTIX cameras can only send GET requests and not POST.
• MxCC Alarm (w/ or w/o acknowledge): This type sends a predefined IP notify message to the computer running MxControlCenter or MxEasy. If the acknowledge is required, the camera will only consider the IP Notify message as successfully sent, if the user acknowledges the messages within a predefined time.
The following sections will go into more detail of the three commonly used profiles, Raw TCP/IP, HTTP/1.0, and MxCC Alarm.
Raw TCP/IP
Raw TCP/IP messages can be used to send information to remote devices. This information can be plain text or text with variables i.e. “Hello world!” or “Temperature: $(SEN.TEX.CELSIUS)”.
Such messages can be used by the receiver to display the information or, in case of MOBOTIX cameras, they can be parsed to trigger IP Receive events and, in turn, to execute Action Groups.
The following two examples show how to send:
• A message with text and variables to display information on a remote camera
• A plain text message to trigger an IP Receive event on a remote camera
Example: Sending a text message to display information on a remote camera
Let’s say we want to send a text message to another camera so that it can be displayed on its live image. When the message configured is something like “Hello world!” then this is exactly what will be sent.
On the other hand, by using variables, you can get a different result each time the message is sent. For example, when you send something like this
Hello World! I’m $(ID.NAME) with event $(FPR.ENO)
then the camera will replace the variables with camera name and event number and this is what will be sent:
Hello World! I’m MX10-12-32-55 with event 001432
All of the available variables and placeholders are listed in the camera help file:
- Variables:
http://<ip_cam>/help/help?longvariable - Placeholders:
http://<ip_cam>/help/help?imagecomment
To make our example a bit more interesting we could decide to send the timestamp and the current temperature to another camera every 10 minutes. Let’s see how to achieve that.

Configuration on Camera A (sender)
First of all we need to create an IP Notify Profile from Admin Menu >> IP Notify Profiles

From the “Predefined Configuration” drop-down menu select “Custom Configuration”, type the IP address of the recipient followed by the port (i.e. 8000) and select “Raw TCP/IP” as a transfer protocol. In the text box you can type static text or you can use variables that will be replaced on the fly by the camera when it’s time to send the message. Press “Set” to apply the changes.

Now we need to schedule the iP Notify profile so that it can be sent every 10 minutes. To do so we need to go to Admin Menu >> Time Tasks.

From the drop-down menu select the IP Notify profile configured above and type “*/10” in the first field. The statement */10 means “every 10” and since it is written in the minutes column it means “every 10 minutes”. Press “Set” to apply the settings and “Close” to store the configuration in the flash memory.

Configuration on Camera B (receiver)
In order to receive the TCP message, Camera B needs to be listening on the same port Camera A is sending the message to (e.i. port 8000).
Go to Setup Menu >> General Event Settings and enable the Arming.


Go to Setup Menu >> Events Overview and click on the “Edit” button in the “Messages” section. Create a new Message event and make sure the port is the same specified in the IP Notify profile of Camera A. The settings of the event are not relevant.


Go to Setup Menu >> Text and Display Settings.

Type the following in the text “Comment” box:
^S10;

This means that we want to display on the live image the last 10 messages received by the camera. Press “Set” to apply the settings and “Close” to store the configuration into the flash memory.
Result

Example: Sending a plain text message to trigger an IP Receive event on a remote camera
Raw TCP/IP message can also be used to execute one or more actions on a MOBOTIX camera. In this example when camera A detect a VM event, it sends a passphrase to camera B located in the same network. When camera B receives the message it compares its content with a predefined text or a regular expression and if it matches an Action Group will be executed.

Configuration on Camera A (sender)
Go to Admin Menu >> IP Notify Profiles and create a new profile as shown in the picture.

Select “Custom Configuration” as a “Predefined Configuration”, type the IP address of the recipient camera followed by the listening port (i.e. 8000), select “Raw TCP/IP” as a “Transfer Protocol” and type Alarm! in the text box.

Go to Setup Menu >> General Event Settings and enable the Arming.


Go to Setup Menu >> Events Overview and click on the “Edit” button in the “Image Analysis Event” section. Create a new Video Motion profile or modify one of the pre-configured profiles.

Go to Setup Menu >> Action Group Overview and create a new Action Group.

The Action Group will be activated by Video Motion events and it will trigger the IP Notify profile called “Alarm”.

Configuration on Camera B (receiver)
In order to receive the TCP message, Camera B needs to be listening on the same port Camera A is sending the message to (e.i. port 8000).
Go to Setup Menu >> General Event Settings and enable the Arming.


Go to Setup Menu >> Events Overview and click on the “Edit” button in the “Messages” section. Create a new Message event and make sure the port is the same specified in the IP Notify profile of Camera A.

Select “IP Receive” as an “Event Sensor Type”, select “String Compare” from the “Match Mode” drop-down menu and type Alert! in the “Message” filed. Press “Set” to apply the settings.

Go to Setup Menu >> Action Group Overview and create a new Action Group.

The Action Group will be activated when a Raw TCP/IP message with the text “Alert!” is received and it will trigger two different actions: Visual Alarm and Play Sound.

HTTP/1.0 Request
HTTP messages can be used to:
• configure a web-server based device (via API - Application Programming Interface)
• send it a command to execute a function (via CGI - Common Gateway Interface).
For instance, when we change the image resolution or the IP address of a MOBOTIX camera through a Web browser or a software like MxCC or MxEasy we use API, whereas when we press the “door” button on the MxApp we execute a command on the camera via CGI.
For security reasons the recipient of the message can require the sender to authenticate before it executes actions or it modifies the configuration. HTTP messages allow thus for authentication: user name and password can be sent along with the command.
On the following page is a breakdown of a MOBOTIX camera HTTP CGI command that can be sent with IP Notify.
http://admin:meinsm@192.168.1.200:80/control/rcontrol?action=sound&soundfile=Alarm
| Token | Function | Remarks |
|---|---|---|
| http:// | Transfer Protocol | If the receiver camera’s HTTPS Web Server is active it’s possible to use https:// as well |
| admin:meinsm | Authentication | User name and password of the user with rights to execute the command on the receiver camera <user>:<password> |
| @ | Separator | Separator between the authentication token and the target |
| 192.168.1.200:80 | Target | IP address or Domain Name followed by the port on which the Web Server is listening to (by default http = 80 and https = 443) |
| /control/rcontrol | CGI Path | Path where the script that executes the commands is located |
| ? | Separator | Separator between the CGI Path and the Command |
| action=sound&soundfile=Alarm | Command | The first value expected by the script is always the name of the action that has to be performed. Depending on the action, additional parameters may be required. Additional parameter are linked with the & symbol |
The list of commands that can be executed by the camera (CGI) is available at the following links:
http://<ip_cam>/admin/rcontrol?list - This page provides commands to execute functions
http://<ip_cam>/control/click.cgi?list - This page provides limited access to vPTZ features
http://<ip_cam>/control/rotorcgi?help - This page provides full access to vPTZ features.
The lists of parameters that can be used to configure the camera (API) are available here:
http://<ip_cam>/control/control?list - This page provides commands to change the settings of the Setup Menu http://<ip_cam>/admin/control?list - This page provides commands to change the settings of the Admin Menu
The following two examples show how to send:
• An HTTP message to play a sound file on a remote camera
• An HTTP message to change the image resolution of a MOBOTIX camera
Example: Using HTTP IP Notify to play a sound on another camera
In the following example we will see how to send an IP notify message to another camera with the instructions to play a sound file called “Alarm”. Camera B does not require any configuration because the sound file “Alarm” is pre-loaded in the software from factory.

NOTE: with HTTP CGI commands it is NOT possible to execute multiple actions on the target camera. To do that please refer to Sending a plain text message to trigger an IP Receive event on a remote camera
Configuration on Camera A (sender)
Go to Admin Menu >> IP Notify Profiles and create a new profile as shown in the picture.

Select “Custom Configuration” as a “Predefined Configuration”, type the IP address of the recipient camera followed by the web server port (i.e. 80), select “HTTP/1.0 Request” as a “Transfer Protocol”. The CGI path contains the path where the script responsible for the action is located (i.e. /control/rcontrol). The HTTP Authentication token contains the user name and the password of a user with sufficient rights to execute the action on the remote camera. Type the command you want to execute in the “Message” text box: action=sound&soundfile=Alarm.
NOTE: When you type the command make sure that there are no white spaces or empty lines before or after the command. Press “Set” to apply the settings.

Go to Setup Menu >> General Event Settings and enable the Arming.


Goto Setup Menu >> Events Overview and click on the “Edit” button in the “Image Analysis Event” section. Create a new Video Motion profile or modify one of the pre-configured profiles.


Go to Setup Menu >> Action Group Overview and create a new Action Group.

The Action Group will be activated by Video Motion events and it will trigger the IP Notify profile called “PlaySound”.

Example: Using HTTP IP Notify to change the image resolution on a MOBOTIX camera
In this example we will configure two Softbuttons on a camera to set the image resolution to VGA or MEGA.
First of all we need to figure out the name of the parameter responsible for the image resolution. To do that we can open the “Setup Menu” and go to “General Image Settings”. In this page we will find the parameter “Image Size”. The same parameter is displayed within the page
http://<ip_cam>/control/control?list§ion=imagecontrol
If we want to change the value of the “Size” parameter to 640x480 we can do it with an HTTP message:
http://<ip_cam>/control/control?set§ion=imagecontrol&size=640x480

Now we need to put this information into a Softbutton.
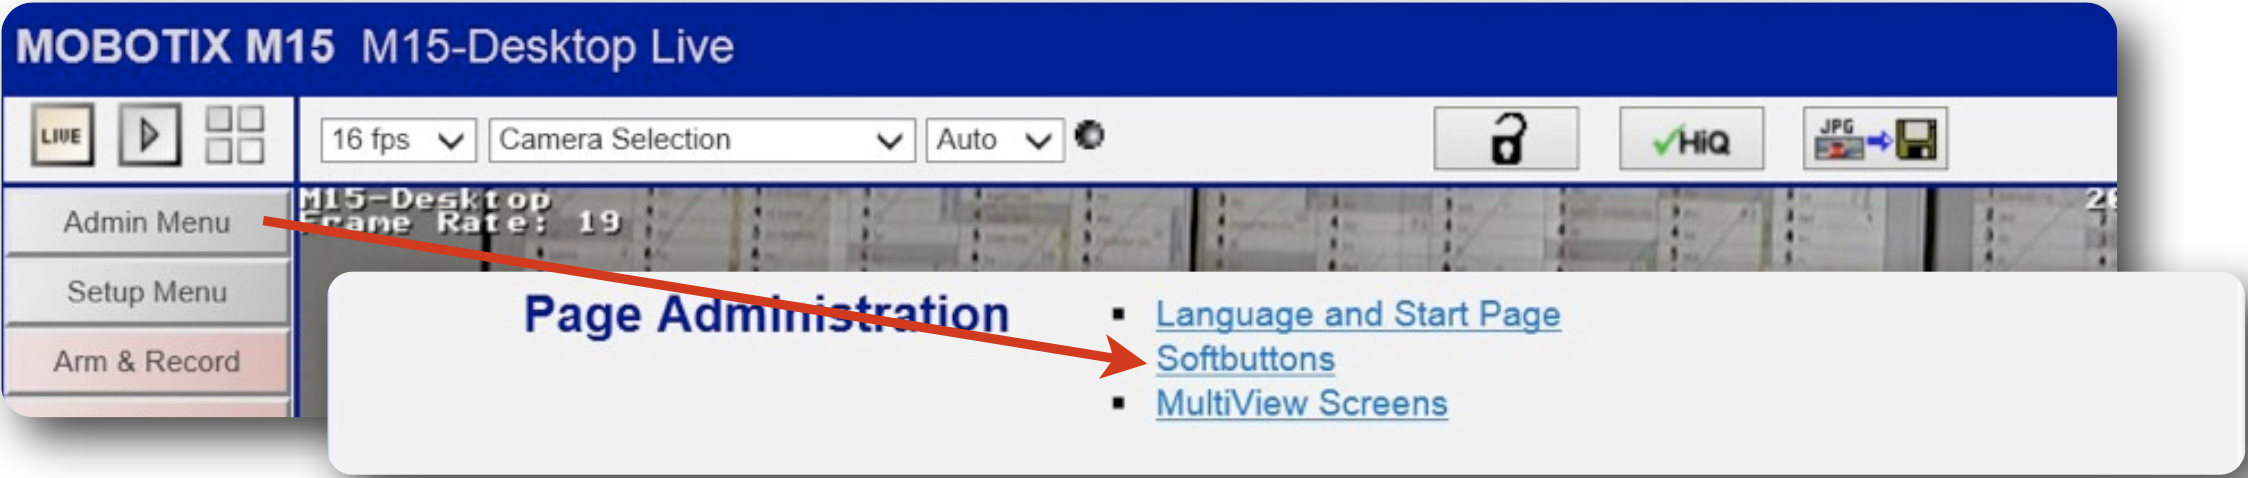
Go to Amin Menu >> Softbuttons.
Scroll down the page and type the following information into the last empty line then press “Set” to apply the settings:

Add another softbutton from the same page. The Name of the softbutton will be “Size MEGA” and the parameters will be section=imagecontrol size=1280x960. Press “Set” to apply the settings.

Go to the camera’s live view page and SHIFT+Click on an existing soft button on the left hand side of the screen. Select “Replace button with” from the first drop-down menu and “Size VGA” from the second drop-down menu then click “Set” to apply the settings.

Repeat the step above to insert the “Size MEGA” softbutton. You will end up with something like this:

Now you can simply click on one of the newly created buttons to change image resolution.
NOTE: the settings will not be stored into the flash memory! In other words if you reboot the camera the image size will go back to the stored values.
MxCC Alarms
IP Notify profiles are also useful to notify Alarms to the MxControlCenter or the MxEasy. In order to simplify the camera configuration it’s possible to select a predefined kind of message called MxCC-Alarm.
In this case the only thing we need to specify is the target(s) of our message.
If we take a closer look at the packet we will see that this message is nothing more than a HTTP message with some information about the sender that will be used by the software to figure out which camera sent the message.
Example: Using MxCC Alarm IP Notify to open a pop-up window on MxControlCenter
In the following example a MOBOTIX camera sends a MxCC-Alarm message to two different MxControlCenter’s in case of Video Motion. The MxCC will open a pop-up window with the live view of the camera.

Camera configuration (sender)
Go to Admin Menu >> IP Notify Profiles and create a new profile as shown in the picture.

Select “MxCC Alarm: simple” as a “Predefined Configuration”, type the IP address of the recipient computers followed by the port on witch MxCC is listening on (i.e. 9000). When you have multiple destination addresses it make sense to specify the send order: Sequential, Parallel or Next on Error.
Sequential send to all: all the devices will be notified one after the other regardless the result of the message
Parallel send to all: all the devices will be notified simultaneously
Send to next on error: the camera will notify the following device(s) only if the first device is not available.

Go to Setup Menu >> General Event Settings and enable the Arming.
Go to Setup Menu >> Events Overview and click on the “Edit” button in the “Image Analysis Event” section. Create a new Video Motion profile or modify one of the pre-configured profiles.
Goto Setup Menu >> Events Overview and click on the “Edit” button in the “Image Analysis Event” section. Create a new Video Motion profile or modify one of the pre-configured profiles.
Go to Setup Menu >> Action Group Overview and create a new Action Group.
The Action Group will be activated by Video Motion events and it will trigger the IP Notify profile called “MxCC- Alarm”.

MxCC Configuration
Go to Tools >> Options >> Alarm Handling. Activate the Alarm Messages, select the port on witch the MxCC will be listening on for alarm messages and check the option “Open extra Live window”.
NOTE: in order to open the pop-up window the sender (camera) needs to be already in the device list of the MxCC.

Testing IP Notify Profiles
Once you have configured an IP Notify, you will want to test it to make sure that it functions as desired. To do this go to Admin Menu >> Test Current Network Configurations. Make sure to allow the PopUp when prompted so that you get the Network Test Log during the test.

Once in the menu find the IP Notify Profile you want to test and click on “Send” to initiate the IP Notify.

Once the profile is initiated there is no output in the main window but in the Network Test Log. When the message has been sent successfully you should see this in the Log.
Conclusion
The IP Notify is a very powerful tool that can be used to customize a camera system. The ability to notify other cameras or MxCC on various events to trigger actions enhances the complete security system to be more useful than each of the camera alone. Additionally, the ability to have the MOBOTIX camera interact automatically with IP enabled 3rd party devices and applications further enhances the complete system.
